On the 16th October, AJ, Oz, Rich Daryl and myself jumped on the train and headed for the Nutural History Museum in London for some full on diversity research....
We were lucky enough to get to check out the new 'Cocoon' wing that houses the labs of the Angela Marmont Centre for UK Biodiversity. The vast scale of the museums collection can be glimpsed in drawer after drawer of wee beasties ;o)
The achitectural gem that is the NHM, stunning!
The great man himself.... Charles Darwin, author of The Origin Of The Species.
Scary coconut cracking crab.
Armour plated beast.
Wooly Mammoth skull.
Armour plated little critter
For me, as well as the awesome collection, the building is also a major draw. It was built specifically for the purpose of housing the exhibits and has animals, birds and lizards sculptured into the very fabric of the building. Well worth a look if you're 'in town'
Friday, 30 October 2009
Thursday, 29 October 2009
Spider customising ;o)
Modeling a Wasp Spider.....
Wednesday, 28 October 2009
Research: Tiptree Heath Ramble.
I dragged lovely Anna out for a ramble at Tiptree Heath at the weekend (complete with flowery wellies;o) to take some photos of the insects and gorse.
Heathland is the countries most endangered habitat and we're lucky enough to have the largest heath in Essex on our doorstep.
To learn more about the Heath, and those that manage it, check the website..... www,tiptreeheath.co.uk
Wednesday, 21 October 2009
Monday, 12 October 2009
Modelling Experiments......
Modelling experiments.....
Friday, 9 October 2009
Thursday, 8 October 2009
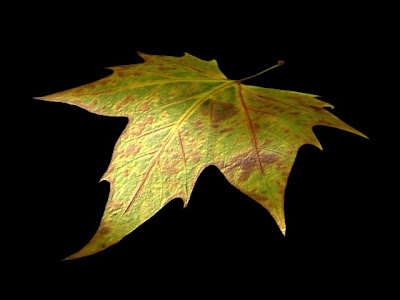
Uni Totorial: Mapping Techniques
This leave image was created from a step by spet tutorial provided by the course tutor.
The following are the basic steps which were used in the leaves creation:
1. Image imported into Photoshop.
2. Cut the leave out using the Magic Wand tool.
3. Create another layer and make it completely white.
4. Adjust the layer visibilities so that the background is black with an all white leave.
5. In 3DS Max, create a Plane.
6. in the Material box, import the Bitmap of the leave.
7. Texture the material by adding Bumps.
8. Apply the material to the plane.
9. Bend the plane into a more realistic leaf shape.
10. Render the scene.
Friday, 2 October 2009
Basic Modelling
I know it's pretty basic stuff, but we all have to start somewhere ;oD
I started off with a basic green Sphere, converted it to an Editable Mesh then moved Faces and vertices until the desired shape was achieved.
To make the 4 bumps on the bottom easier to manipulate, I selected the Vertices, then named and grouped them in the Named Selection Sets entry field.
I started off with a basic green Sphere, converted it to an Editable Mesh then moved Faces and vertices until the desired shape was achieved.
To make the 4 bumps on the bottom easier to manipulate, I selected the Vertices, then named and grouped them in the Named Selection Sets entry field.
Subscribe to:
Posts (Atom)